

Showing posts with label Link Party. Show all posts
Showing posts with label Link Party. Show all posts
Wednesday, December 15, 2010

Sunday, November 28, 2010
Elf Your Neighbor---Free Printables
We haved been "Boo'ed" in the past but I thought I would start a new neighbohood game---We've Been Elfed!
I created some free printables for you to download and print. All I ask is you become a follower in return :)
To Elf Your Neighbor...Print out two copies of the instruction sheet and two copies of the "We've Been Elfed!" sign.


Include some treats or small gifts in a bag along with the free printables! One of the treats we included in our gift bags were Elf Cookies...our take on Bakerella's Cowgirl Cookies!
Our Free Printable Elf Cookie Labels Here!

Pick two neighbors and follow the free printable instructions to begin Elfing!!!
I created the free printables using free scrapbooking pack from Shabby Princess as well as Free Online Elf Clipart.
Happy Holidays!


I created some free printables for you to download and print. All I ask is you become a follower in return :)
To Elf Your Neighbor...Print out two copies of the instruction sheet and two copies of the "We've Been Elfed!" sign.


Include some treats or small gifts in a bag along with the free printables! One of the treats we included in our gift bags were Elf Cookies...our take on Bakerella's Cowgirl Cookies!
Our Free Printable Elf Cookie Labels Here!

Pick two neighbors and follow the free printable instructions to begin Elfing!!!
I created the free printables using free scrapbooking pack from Shabby Princess as well as Free Online Elf Clipart.
Happy Holidays!
Monday, May 10, 2010
The Twins Make Chocolate Peanut Butter Drops...Mmmm!
I tried a new version of this recipe and these things taste and have almost the same texture as Reeses! Mmmm-mmmm-mmmm is all I have to say about these yummy morsels!!!
Add the natural peanut butter to your bowl. It is important to use natural peanut butter meaning peanut butter containing only peanuts and salt in the ingredients to get the Reese's like taste and texture. I think we used Smucker's Creamy Peanut Butter.

Add the confectioner's sugar, vanilla and salt. Looks like somebody got caught tasting the peanut butter. LOL!


Chocolate Peanut Butter Drops
Printable Recipe
2/3 cup Creamy NATURAL Peanut Butter
2 1/2 tbsp butter
1/4 tsp pure vanilla extract
1/8 salt
1 cup confectioner's sugar
12 oz semi sweet chocolate chips
2 tsp vegetable shortening
1) With a mixer, combine peanut butter, butter, vanilla, and salt on low.
2) Add confectioner's sugar and mix until well blended.
3) Add additional confectioner's sugar if needed.
4) Shape into 1" ball. Place on cookie sheet lined with parchment paper and put in freezer for 15-20 minutes.
5) Put chocolate chips and vegetable shortening in microwave safe bowl.
6) Microwave for 45 seconds on medium. Stir and repeat until completely smooth.
7) Working quickly so PB balls do not get soft, use a fork to dip PB drops into melted chocolate, rolling around to completely cover. Gently tap fork on edge of bowl to remove excess chocolate. Place on parchment paper. If you wish, you can use a toothpick to create a little swirl on top. Refrigerate or freeze. You may need to put chocolate back in microwave will dipping to re-melt and stir until smooth.


Add the confectioner's sugar, vanilla and salt. Looks like somebody got caught tasting the peanut butter. LOL!
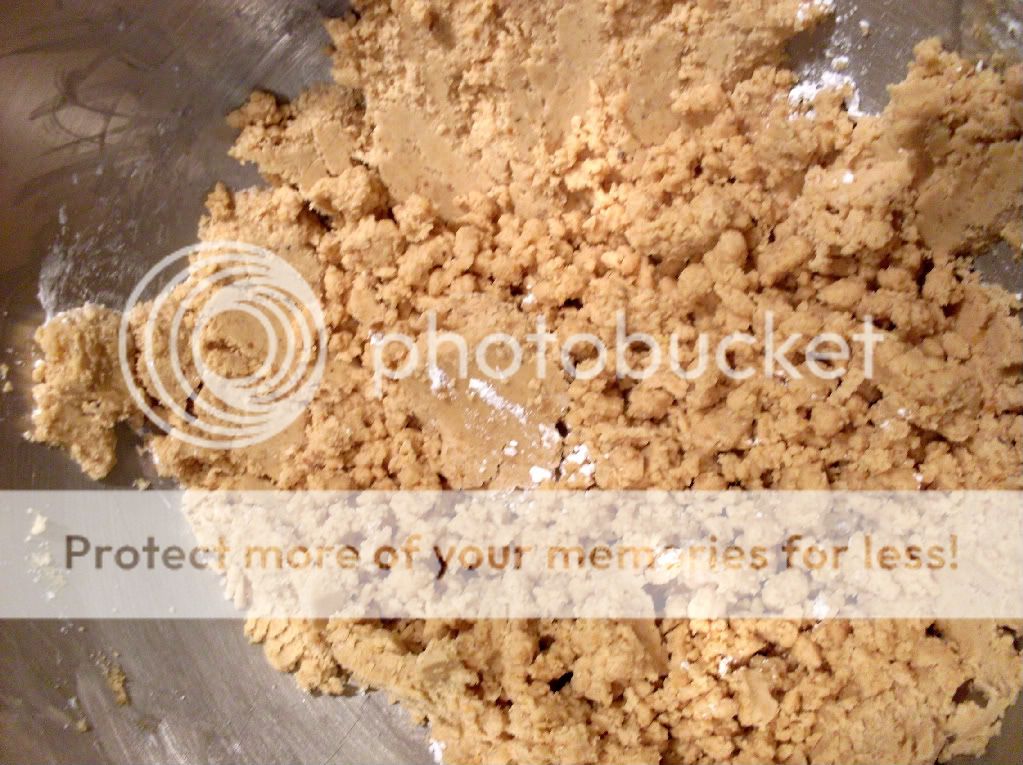
Your mixture will be a little crumbly but when you form the peanut butter balls it will come together nicely.

Mmmm-mmmm...Look at all that peanut butter deliciousness !
Then, dip those babies in the melted chocolate and make yourself a cute lil swirl on top with a toothpick. I realize there are no dipping pictures. Dipping 20 PB drops with 4 1/2yr old twins plus using a camera was too much for me LOL!

After all that hard work you deserve to take a bite and enjoy! Ok well if you are like me...maybe 4 or 5 bites and enjoy!
Chocolate Peanut Butter Drops
Printable Recipe
2/3 cup Creamy NATURAL Peanut Butter
2 1/2 tbsp butter
1/4 tsp pure vanilla extract
1/8 salt
1 cup confectioner's sugar
12 oz semi sweet chocolate chips
2 tsp vegetable shortening
1) With a mixer, combine peanut butter, butter, vanilla, and salt on low.
2) Add confectioner's sugar and mix until well blended.
3) Add additional confectioner's sugar if needed.
4) Shape into 1" ball. Place on cookie sheet lined with parchment paper and put in freezer for 15-20 minutes.
5) Put chocolate chips and vegetable shortening in microwave safe bowl.
6) Microwave for 45 seconds on medium. Stir and repeat until completely smooth.
7) Working quickly so PB balls do not get soft, use a fork to dip PB drops into melted chocolate, rolling around to completely cover. Gently tap fork on edge of bowl to remove excess chocolate. Place on parchment paper. If you wish, you can use a toothpick to create a little swirl on top. Refrigerate or freeze. You may need to put chocolate back in microwave will dipping to re-melt and stir until smooth.
Friday, May 7, 2010
Mother's Day Brunch Menu...Recipes Included

This year I will be hosting a Mother's Day Brunch at my house! Hopefully, my hydrangeas will still have some of these gorgeous blooms on them!!
Here is the menu I planned for this Sunday. If you need any ideas for your own brunch I have included some printable tasty recipes. Just click the links below. I plan to print out my menu on nice cardstock and post it in a shabby chic frame on the buffet table.
MENU
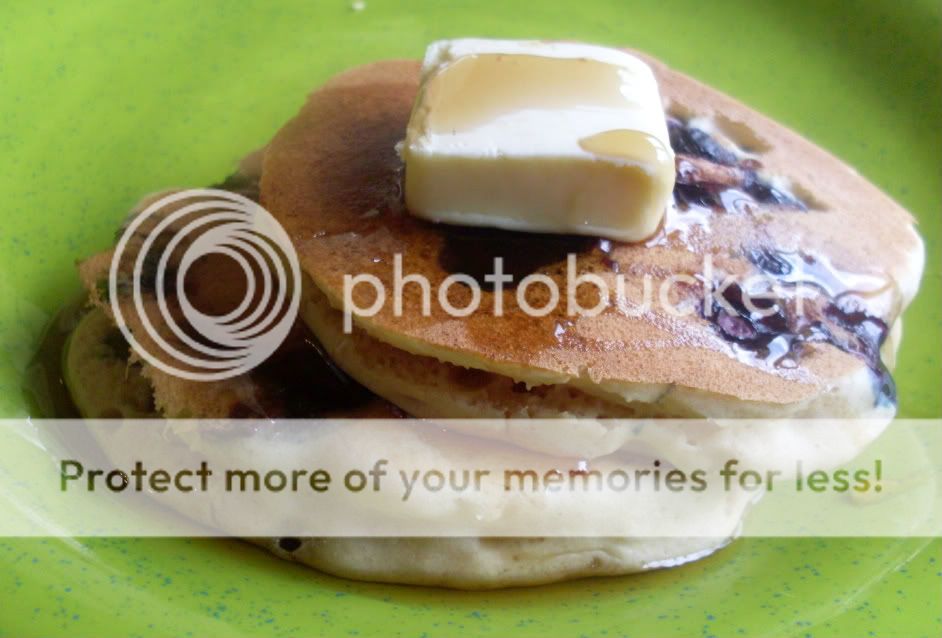
Assorted Pancakes - Blueberry & Chocolate Chip
Warm Maple Syrup
Fresh Fruit Salad
Crispy Bacon
Turkey Sausage Patties
Cheesy Hashbrown Casserole
Fluffy Scrambled Eggs with Assorted Mix-ins
Croissants
Sliced Honey Ham
Carved Turkey Breast
Orange Juice
Fresh Squeezed Lemonade
Spa Water
Mimosas
Fruity Rum Punch
I'm participating in these great link parties:

Monday, April 26, 2010
Cinco de Mayo Time!!!
It's Cinco de Mayo time! Here are some yummy treats to get you geared up for the big day!

Here are my recipes:
Blackened Mahi-Mahi (Fish Tacos)
Mango Salsa
Cilantro Lime Rice
Guacamole
Margarita Cupcakes
Enjoy!!
(Source: Shabby Princess Happy Go Lucky Scrapkit)

I'm participating in these awesome Link Up parties:
~Monday:
sumossweetstuff
thegirlcreative
~Tuesday:
blessedwithgrace ~TMTT
allthesmallstuff ~ Tuesday's at the Table
Crazy Daisy ~Tuesday's Tastes
beautyandbedlam ~Tasty Tuesday

Here are my recipes:
Blackened Mahi-Mahi (Fish Tacos)
Mango Salsa
Cilantro Lime Rice
Guacamole
Margarita Cupcakes
Enjoy!!
(Source: Shabby Princess Happy Go Lucky Scrapkit)
I'm participating in these awesome Link Up parties:
~Monday:
sumossweetstuff
thegirlcreative
~Tuesday:
blessedwithgrace ~TMTT
allthesmallstuff ~ Tuesday's at the Table
Crazy Daisy ~Tuesday's Tastes
beautyandbedlam ~Tasty Tuesday
Saturday, April 17, 2010
Girl Power: Paper Butterfly Wall Decor (PB Inspired)
I fell in love with these cute little butterflies from Pottery Barn Kids. My lil sweet pea has a Pottery Barn Kids quilt in her room and she loves butterflies so I thought it would be perfect!


I found the perfect spot on the wall in my sweet pea's room and applied my beautiful swallowtail butterfly!

Here is what I did:

(photo credit: Pottery Barn Kids Catalog)
So I decided to give it a try:
I printed out a butterfly pattern on my two sided paper (Amy Butler K&Co ).
).
).
I cut out the pattern inside the lines so they would now show on the final product. Using a boning tool, I folded up the wings to give it a 3-D look.

Then I flipped my butterfly over and applied double sided tape.


Here is what I did:
Supplies
2-sided scrap bookpaper (good quality thick paper)
scissors
boning tool
double sided tape
1) Choose coordinating scrapbook papers to match your room decor.
2) Print out the pattern. ***This pattern is set to print on 12x12 scrapbook paper so make sure to check the box "scale to fit" to your paper size if you are using 8.5x11 letter sized paper.
3) Cut out your butterflies right inside the lines so they do not show in final product.
4) Using a boning tool, gently fold up the two sides of the wings where they meet the body of the butterfly. This gives the 3-D appearance you are going for. It looks like the butterfly just landed on your wall.
5) Remove one side of double stick tape and apply to back of body of your butterfly.
6) Determine spot on your wall and peel and stick your butterfly right on.
They look really cute in a little cluster. You can reduce the print size of your image in print set-up area to make 3 different sizes like PB if you wish.
~ Enjoy :)
Tuesday, April 13, 2010
Cinnamon Apple Crisp
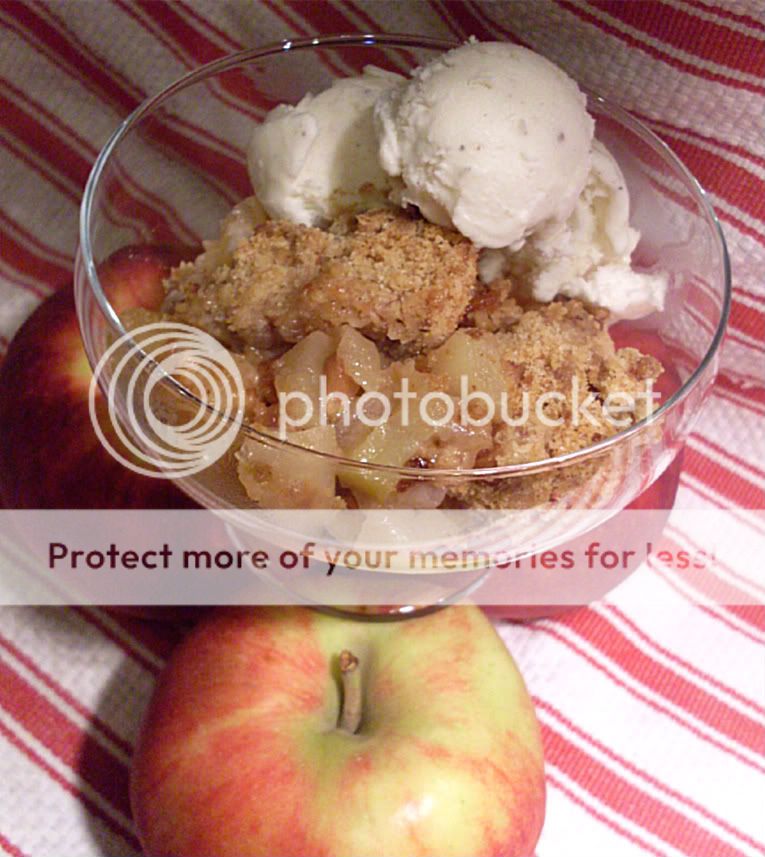
Fireman had an airforce buddy stay here for one night until his flight home the next morning. Kinda last minute so I had to whip together dinner super fast. We had indoor grilled salmon (recipe coming soon), asparagus with hot pepper oil and balsamic glaze, roasted dutch potatoes with thyme, iron skillet rosemary dinner rolls and last but not least APPLE CRISP with natural vanilla bean ice cream!

Apple Crisp
2-3 large jonagold apples, peeled, cored, diced
2/3 cup sugar
1/4 tsp salt
1/2 tsp cinnamon
juice of 1/2 lemon
1 1/2 cup flour
1/3 cup sugar
1/3 cup brown sugar
1/2 tsp cinnamon
1/2 cup finely chopped pecans
1 stick butter melted
1) Preheat oven to 350 degrees F.
2) Toss diced apples with lemon juice in 8.5 x 11 rectangular baking dish.
3) With clean hands, combine diced apples, 2/3 cup sugar, 1/4 tsp salt and 1/2 tsp cinnamon.
4) In medium bowl, combine flour, sugar, brown sugar, cinnamon, and pecans. Drizzle with melted butter. Stir with a fork to combine.
5) Top apples with crumb topping.
6) Bake for 30 minutes in middle of oven.
7) Check and bake for an additional 10 minutes in top of oven until lightly brown and apples are bubbly.
Adapted from Pioneer Woman's Pear-Cinnamon Crisp.
***To make it extra yummy, allow your ice cream to soften slightly and stir in some cinnamon.
 @BlessedWithGrace


Apple Crisp
2-3 large jonagold apples, peeled, cored, diced
2/3 cup sugar
1/4 tsp salt
1/2 tsp cinnamon
juice of 1/2 lemon
1 1/2 cup flour
1/3 cup sugar
1/3 cup brown sugar
1/2 tsp cinnamon
1/2 cup finely chopped pecans
1 stick butter melted
1) Preheat oven to 350 degrees F.
2) Toss diced apples with lemon juice in 8.5 x 11 rectangular baking dish.
3) With clean hands, combine diced apples, 2/3 cup sugar, 1/4 tsp salt and 1/2 tsp cinnamon.
4) In medium bowl, combine flour, sugar, brown sugar, cinnamon, and pecans. Drizzle with melted butter. Stir with a fork to combine.
5) Top apples with crumb topping.
6) Bake for 30 minutes in middle of oven.
7) Check and bake for an additional 10 minutes in top of oven until lightly brown and apples are bubbly.
Adapted from Pioneer Woman's Pear-Cinnamon Crisp.
***To make it extra yummy, allow your ice cream to soften slightly and stir in some cinnamon.
@BlessedWithGrace
Girl Power: 30 minute purse for your little rockstar
Just some things I made last night....30 minute purse, twirly skirt, and applique tank for my lil sweet pea! My sewing machine has been upstairs collecting dust. Sweet Pea has been begging me to make her another purse for the longest!


I got some inspiration from a purse I made her awhile ago and also some very useful information
from Skip To My Lou which I used in my tutorial as well.
I posted a short tutorial on how I did this here!
Here are the other pieces:

I have plans to add some gemstones to the guitar after I peel it off and put it on the right way LOL! Guess it was a little late and I didn't flip it before I traced it on the fusible webbing. Oh well!
Have a Terrific Tuesday!

Friday, April 9, 2010
RRF: Berry Banana Extreme Smoothie and GP Converse Makeover

Robin Robin is 1 year old! I'm participating today for the first time! It is a link party and a giveway. Go check it out!
Here are my two posts for RRF:
Berry Banana Extreme Smoothie
Girl Power: Converse Makeover Part 1
Tuesday, April 6, 2010
Chipotle Lovers...Look No Further...30 minute meal
If you love chipotle like we do then you need to check this out! I have been trying to re-create some chipotle menu items. This one is pretty tasty and quick! It tastes like a combo of chipotle chicken with chipotle hot salsa. Caution: This is pretty spicy so put some chicken on the side first for the kiddos!
BTW...the chicken is BOGO at Publix Supermarkets this week ;)

Click here for Printable Recipes!
Spicy Chipotle Chicken
3 tbsp oil
4 cloves garlic, minced
1/2 red or spanish onion, thinly sliced
10 oz can Rotel (diced) tomatoes with green chiles, drained
2 Chipotle peppers in adobo sauce, chopped
4 tbsp adobo sauce from chipotle peppers
1 package of Perdue Shortcuts Carved Chicken Breast, Southwestern Style, CUBED
1/4 cup fresh cilantro, chopped
1) Add oil to skillet and cook onions and garlic over medium-low heat for 10 minutes to start carmelization process.
2) Add diced tomatoes, chipotle peppers, adobo sauce and chicken. Stir to combine.
3) Cook over medium to medium high for 3-5 minutes to warm all ingredients and reduce any liquid.
4) Stir in cilantro.
Serve with shredded white cheddar cheese, lime-cilantro rice, chopped green leaf lettuce, and guacamole!

Lime-Cilantro Rice
2 cups uncooked white rice (jasmine or basmati) use traditional white rice...Not uncle bens style rice
3 1/2 to 4 cups water depends on your rice you choose
juice of 1 1/2 limes
zest of 1/2 to 1 lime
1 tsp vegetable oil
1/2 tsp salt
1/4 cup fresh cilantro or more to your taste preference
1) Add rice, salt, water and juice of 1 lime in rice cooker or heavy pot with tight fitting lid.
2) Cook rice approx. 20 minutes until done. Fluff rice with fork and allow to rest with lid on for another 5 minutes to redistribute moisture throughout.
3) When rice is cooked, toss rice with 1 tsp oil, juice of 1/2 lime, zest of 1 lime and cilantro.
Click here for chipotle corn salsa recipe.
BTW...the chicken is BOGO at Publix Supermarkets this week ;)

Spicy Chipotle Chicken
3 tbsp oil
4 cloves garlic, minced
1/2 red or spanish onion, thinly sliced
10 oz can Rotel (diced) tomatoes with green chiles, drained
2 Chipotle peppers in adobo sauce, chopped
4 tbsp adobo sauce from chipotle peppers
1 package of Perdue Shortcuts Carved Chicken Breast, Southwestern Style, CUBED
1/4 cup fresh cilantro, chopped
1) Add oil to skillet and cook onions and garlic over medium-low heat for 10 minutes to start carmelization process.
2) Add diced tomatoes, chipotle peppers, adobo sauce and chicken. Stir to combine.
3) Cook over medium to medium high for 3-5 minutes to warm all ingredients and reduce any liquid.
4) Stir in cilantro.
Serve with shredded white cheddar cheese, lime-cilantro rice, chopped green leaf lettuce, and guacamole!

Lime-Cilantro Rice
2 cups uncooked white rice (jasmine or basmati) use traditional white rice...Not uncle bens style rice
3 1/2 to 4 cups water depends on your rice you choose
juice of 1 1/2 limes
zest of 1/2 to 1 lime
1 tsp vegetable oil
1/2 tsp salt
1/4 cup fresh cilantro or more to your taste preference
1) Add rice, salt, water and juice of 1 lime in rice cooker or heavy pot with tight fitting lid.
2) Cook rice approx. 20 minutes until done. Fluff rice with fork and allow to rest with lid on for another 5 minutes to redistribute moisture throughout.
3) When rice is cooked, toss rice with 1 tsp oil, juice of 1/2 lime, zest of 1 lime and cilantro.
Click here for chipotle corn salsa recipe.
Wednesday, March 31, 2010
Wordless Wednesday-Sweet Pea at Flower and Garden Festival
Wordless Wednesday...well sort of! My Little Sweet Pea at Epcot's Flower and Garden Festival. She is all about that purse these days her Auntie Von made for her! She is growing up so fast right before my eyes. Love you Sweet Pea!

Monday, March 29, 2010
Cheesy Roasted Red Pepper Turkey Burgers with Carmelized Onions
Mmmm...turkey burgers are my favorite! Especially when layered with melted cheese and piled high with the sweetness of carmelized onions and roasted red peppers on a toasty bun!

Printable Recipe
1.25 lbs ground turkey (93/7)
3 tbsp worcheshire sauce
1/2 tsp each salt and freshly ground black pepper, to taste
2 cloves garlic, minced
2 tbsp olive oil
1 tsp italian seasoning, dried
1 whole roasted red pepper
4 oz cheese (monterey jack, cheddar, or mozzarella), grated
4-8 Potato Rolls
1 whole Onion, Carmelized
1) Saute garlic in oil for 2-3 minutes. Reserve oil.
2) Combine ground turkey, worcheshire sauce, salt, pepper italian seasoning and garlic.
3) Form into compact patties...careful not to handle too much. 4 normal sized patties or 8 sliders
4) Place on oiled grill or grill pan over medium heat.
5) Cook about 5 minutes on one side.
6) Carefully flip (only once) and allow to cook until internal temperature reaches 160-170 degrees F about 5 minutes.
7) Top burgers with cheese. When cheese begins to melt remove burgers from heat.
8) Brush the rolls using oil from sauteed garlic. Toast the rolls on grill briefly.
9) Place burger on bun and top with roasted red peppers and carmelized onions. Top with bun.
Had to come up with something yummy for TMTT from Blessed with Grace and TATT from All the Small Stuff.


Subscribe to:
Posts (Atom)


