Showing posts with label So Crafty. Show all posts

Wednesday, February 16, 2011

Disney Theme Birthday Banner and Letter from Mickey


I made this banner using my Silhouette SD for twins birthday trip to Disney World. It is made from solid cardstock and pattern scrapbook papers. The font is called Disney Park. We stayed in this cool Pirates of Caribbean themed room.


I also made this birthday greeting from Mickey Mouse. I decorated the room while FireMan and the twins explored our hotel. Boy were the kids happy when they saw this! I also requested a birthday phone call from Goofy on their "real" birthday the next morning. That was super cool!

Saturday, April 17, 2010

Girl Power: Paper Butterfly Wall Decor (PB Inspired)

I fell in love with these cute little butterflies from Pottery Barn Kids. My lil sweet pea has a Pottery Barn Kids quilt in her room and she loves butterflies so I thought it would be perfect!


So I decided to give it a try:

I printed out a butterfly pattern on my two sided paper (Amy Butler K&Co).


I cut out the pattern inside the lines so they would now show on the final product. Using a boning tool, I folded up the wings to give it a 3-D look.


Then I flipped my butterfly over and applied double sided tape.


I found the perfect spot on the wall in my sweet pea's room and applied my beautiful swallowtail butterfly!


Here is what I did:

Supplies
2-sided scrap bookpaper (good quality thick paper)
scissors
boning tool
double sided tape

1) Choose coordinating scrapbook papers to match your room decor.

2) Print out the pattern. ***This pattern is set to print on 12x12 scrapbook paper so make sure to check the box "scale to fit" to your paper size if you are using 8.5x11 letter sized paper.

3) Cut out your butterflies right inside the lines so they do not show in final product.

4) Using a boning tool, gently fold up the two sides of the wings where they meet the body of the butterfly. This gives the 3-D appearance you are going for. It looks like the butterfly just landed on your wall.

5) Remove one side of double stick tape and apply to back of body of your butterfly.

6) Determine spot on your wall and peel and stick your butterfly right on.

They look really cute in a little cluster. You can reduce the print size of your image in print set-up area to make 3 different sizes like PB if you wish.

~ Enjoy :)

The Girl CreativeMaking

Tuesday, April 13, 2010

Girl Power: 30 minute purse for your little rockstar

Just some things I made last night....30 minute purse, twirly skirt, and applique tank for my lil sweet pea! My sewing machine has been upstairs collecting dust. Sweet Pea has been begging me to make her another purse for the longest!


I got some inspiration from a purse I made her awhile ago and also some very useful information
 from Skip To My Lou which I used in my tutorial as well.

I posted a short tutorial on how I did this here!

Here are the other pieces:

I have plans to add some gemstones to the guitar after I peel it off and put it on the right way LOL! Guess it was a little late and I didn't flip it before I traced it on the fusible webbing. Oh well!

Have a Terrific Tuesday!

The DIY Show OffDIY Day @ ASPTL
Photobucket

Friday, April 9, 2010

RRF: Berry Banana Extreme Smoothie and GP Converse Makeover


Robin Robin is 1 year old! I'm participating today for the first time! It is a link party and a giveway. Go check it out!

Here are my two posts for RRF:

Berry Banana Extreme Smoothie

Girl Power: Converse Makeover Part 1

Saturday, April 3, 2010

Girl Power: Converse Makeover Part 1

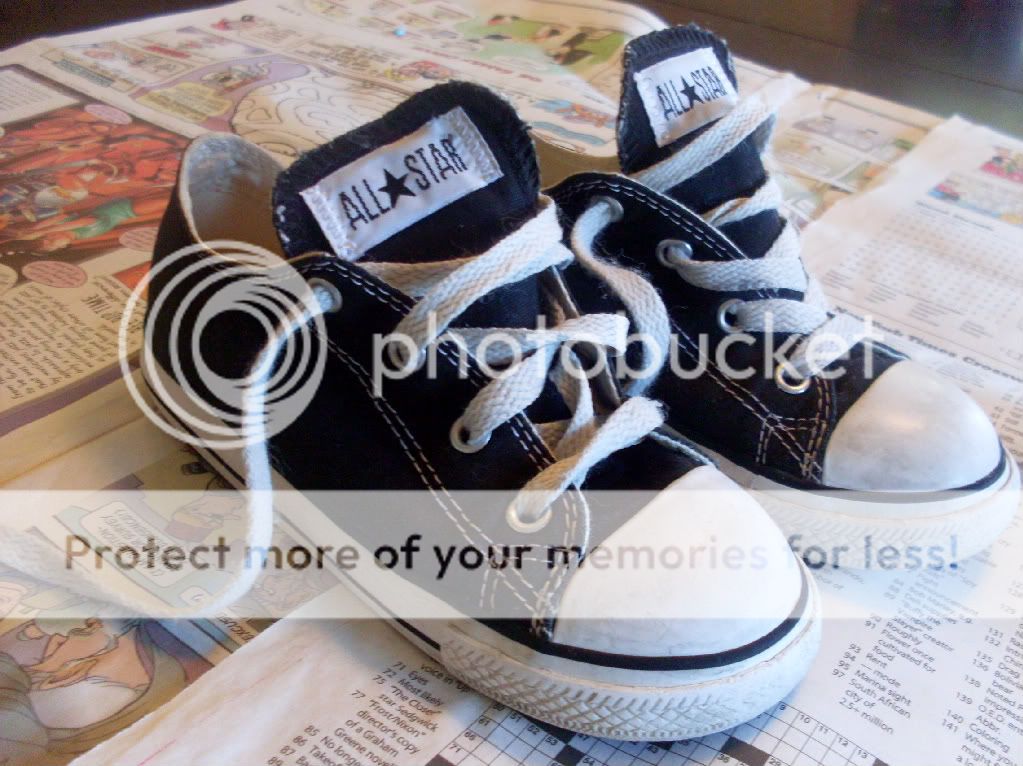
My little sweet pea got some converse hand me downs from her brother! But not stylish enough for my little fashionista! So we did a little converse makeover.

Start with a pair of converse sneakers...new or cleaned up hand me downs.


Place a dab of glue and rhinestones onto separate plates.


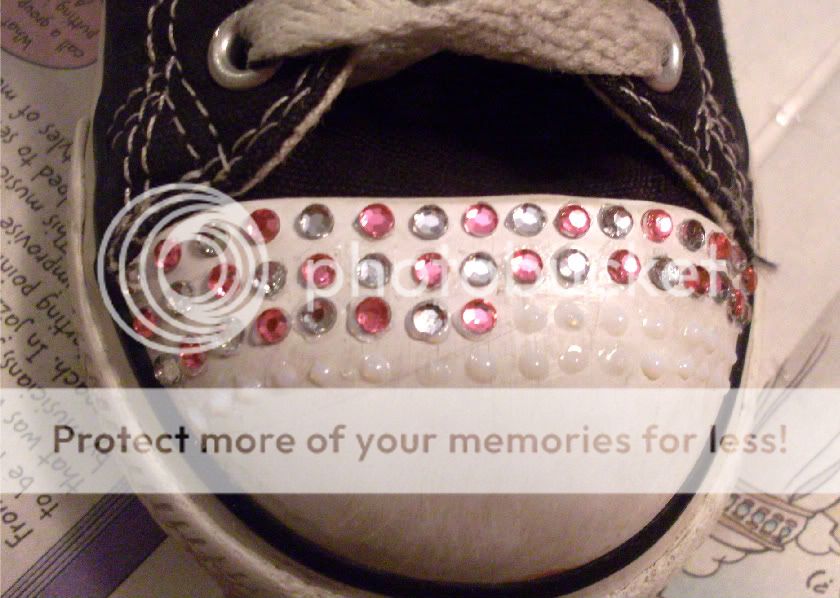
Using a toothpick apply small dots of glue to front of sneakers in a row. It is best to work two to three rows at a time.


Using the tweezers grasp and apply the rhinestones to your sneaker pressing firmly to attach.


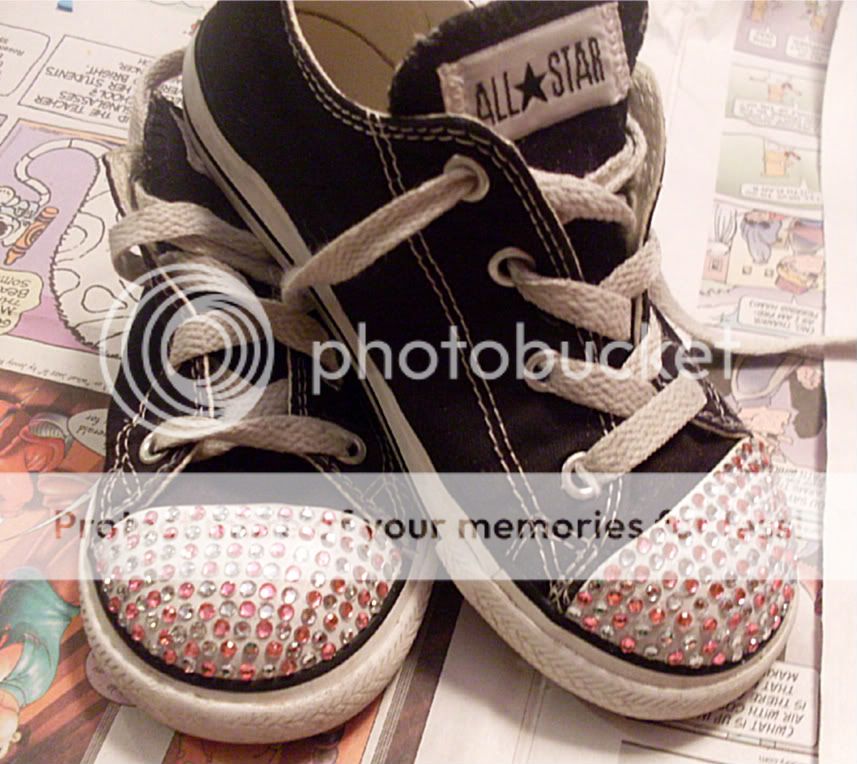
Keep following the glue and apply technique until the entire front of sneaker is covered in rhinestones.


Girl Power: Converse Makeover Part 1

What you need:
converse sneakers
embellishing glue like Gem Tac or E600 ***(I tried Jewel It but it's not strong enough for shoes)
3MM round rhinestones: traditional silver and pink
toothpicks
tweezers
paper plate
newspaper

1) Clean your sneakers if they are hand me downs.
2) Line your work surface with newspaper. Remember this glue is permanent.
3) Put a small amount of glue on your paper plate.
4) Using a toothpick make small dots of glue on the front of your sneakers working 2 rows at a time.
5) Dump your rhinestones on another paper plate.
6) Use your tweezers to grasp and apply your rhinestones to your glue dots pressing firmly into place.
7) Follow same technique to fill the front of sneaker with rhinestones.
8) Allow glue to set for 20 minutes and use another toothpick to remove excess glue from around rhinestones.
9) Allow to dry at least 24 hours before wearing.

Stay tuned for Converse Makeover Part 2!
Related Posts with Thumbnails